You are currently viewing documentation for CompuTec ProcessForce 3.0, which is a plugin installed and managed through CompuTec AppEngine 3.0, built on .NET 8.
If you are working with older environments, you may need the documentation for CompuTec ProcessForce 2.0, which is still supported: https://learn.computec.one/docs/processforce/2.0/.
Please note that CompuTec AppEngine 3.0 introduces a new architecture. All CompuTec components, including the CompuTec ProcessForce 3.0 plugin, must be updated together to ensure full compatibility.
Before starting your installation or upgrade process, we strongly recommend reviewing the CompuTec AppEngine 3.0 and CompuTec ProcessForce 3.0 documentation.
Disabling Debug Mode
Debug mode helps you collect detailed information for troubleshooting when you notice inconsistencies in scenario results. Debug mode provides a way to capture detailed information, making it easier for support teams to analyze and resolve problems. By enabling debug mode, users can extract relevant data and attach it to a support ticket for troubleshooting. This guide shows how to enable, use, and disable debug mode effectively.
If you suspect that the scenario results are incorrect, please report the issue by submitting a ticket to CompuTec Support. When documenting tickets, be sure to use debug mode.
How-to Guide: Enable and Use Debug Mode
Follow these steps to activate debug mode and collect the necessary data for support.
Step 1: Turn on Debug Mode
-
Open the application using the following URL:
https://localhost:54001/webcontent/launchpad/webapp/Index.html?aedebug=true -
Press Enter. Debug mode is now active.
Step 2: Identify Debug Mode Activation
-
You’ll see a Load icon on the scenario list (CompuTec view).
-
A Download icon will appear above the scenario (User view).

Step 3: Run and Correct the Scenario
-
Run the relevant scenario.
-
Open the Recommendation tab.
-
Enter the correct data to replace any incorrect values.
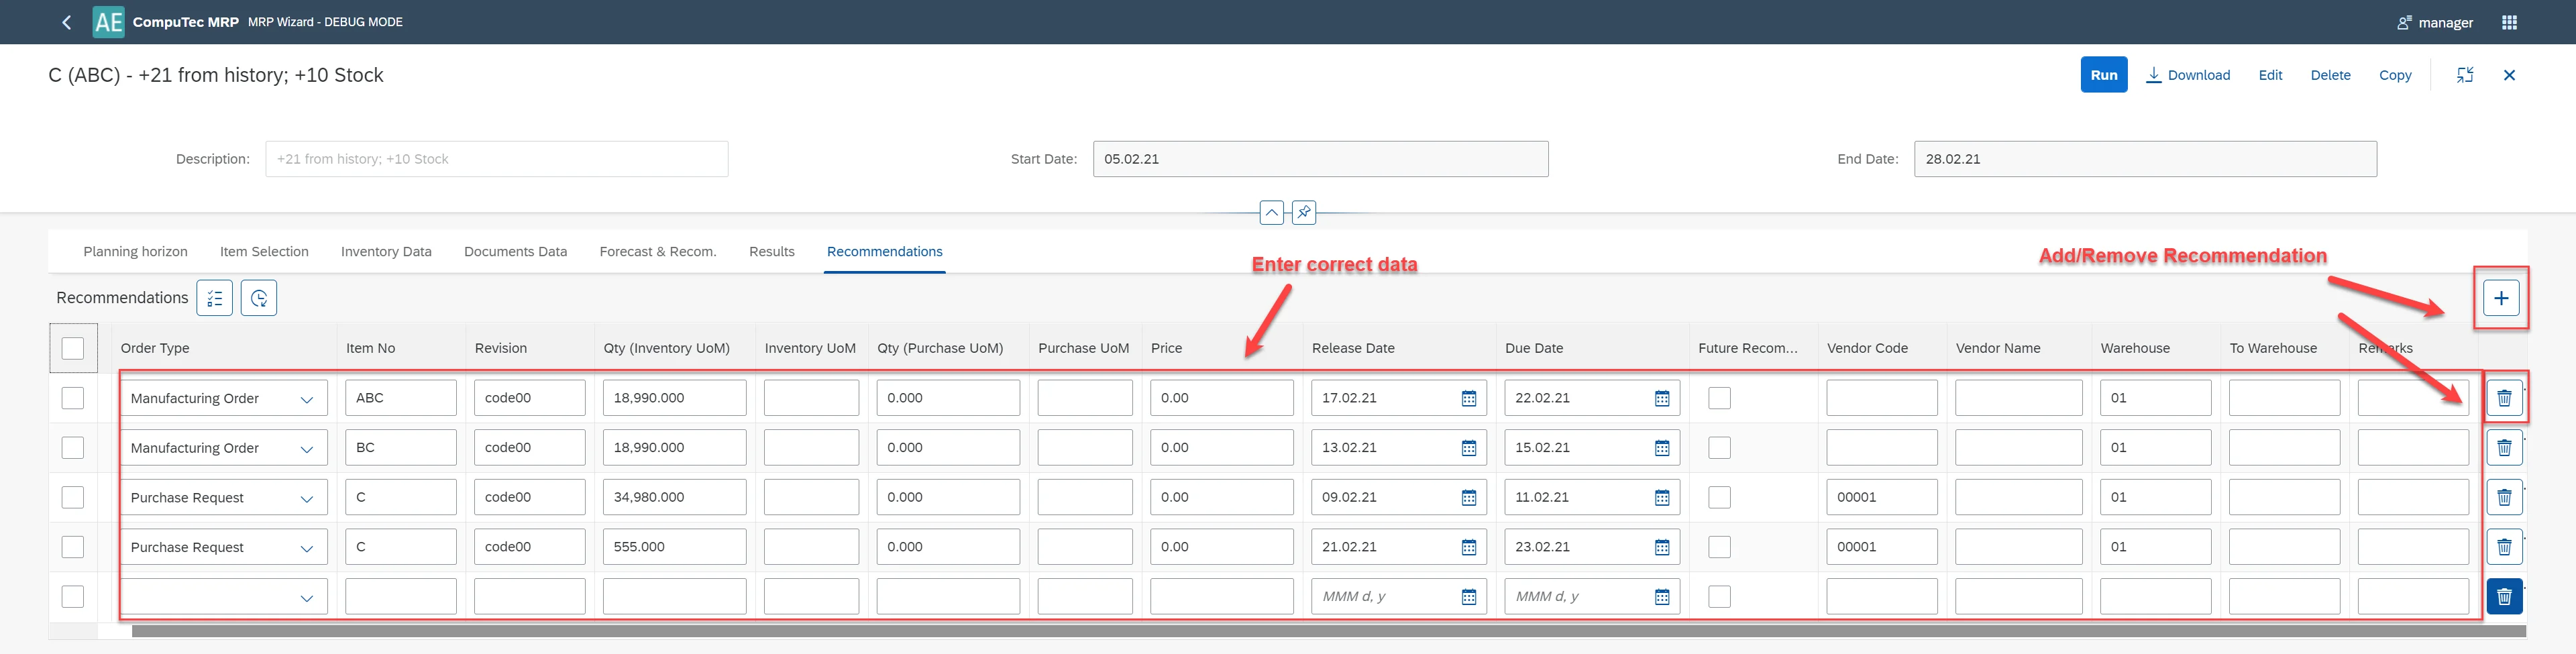
Step 4: Download and Submit Debug Data
- Click the Download icon to save the JSON file.
- Go to the CompuTec Support Portal and create a support ticket.
- Attach the downloaded JSON file and include screenshots if needed.
Step 5: Turn Off Debug Mode
Update the URL by changing aedebug=true to aedebug=false:
-
Enabled:
https://localhost:54001/webcontent/launchpad/webapp/Index.html?aedebug=true#/plugin/computec.appengine.MRP&home -
Disabled:
https://localhost:54001/webcontent/launchpad/webapp/Index.html?aedebug=false#/plugin/computec.appengine.MRP&home
Approve to confirm and exit debug mode.
Tutorial: First Time Using Debug Mode?
If you're new to using debug mode, start here:
- Copy and paste the debug-enabled URL.
- Run a known test scenario.
- Download the JSON output.
- Review it briefly to understand the structure.
- Disable debug mode and revert to regular usage.
This practice run helps you become comfortable with the process before using it during real issues.