You are currently viewing documentation for CompuTec ProcessForce 3.0, which is a plugin installed and managed through CompuTec AppEngine 3.0, built on .NET 8. If you are working with older environments, you may need the documentation for CompuTec ProcessForce 2.0: https://learn.computec.one/docs/processforce/2.0/.
Please note that CompuTec ProcessForce 2.0 will be supported only until December 31, 2026. After this date, the product will no longer receive regular support or maintenance updates. Read more
CompuTec AppEngine 3.0 introduces a new architecture, and all CompuTec components, including the CompuTec ProcessForce 3.0 plugin, must be updated together to ensure full compatibility.
Before starting your installation or upgrade process, we strongly recommend reviewing the CompuTec AppEngine 3.0 and CompuTec ProcessForce 3.0 documentation.
Configure CompuTec Service Manager
CompuTec Service Manager is part of the CompuTec License Server suite. It provides a central location for managing CompuTec services and licensing components.
Using CompuTec Service Manager, you can:
- Start, stop, and restart CompuTec services.
- Configure service settings.
- Manage terminal licenses and licensing components for CompuTec solutions.
- Review and update License Server settings.
- Access service logs and diagnostic information.
Before you start
Before you begin, make sure that:
- CompuTec License Server is installed.
- You have
administratorpermissions on the Windows server.
For installation instructions, see the CompuTec License Server Installation guide.
Open CompuTec Service Manager
To use CompuTec Service Manager, follow these steps:
-
Open the Windows Start menu.
-
Locate and launch CompuTec Service Manager.

-
After the application starts, the CT icon appears in the Windows notification area.
-
Click the CT icon to open the CompuTec Service Manager window.

-
The main Service Manager window displays all available CompuTec services.

From here, you can:
- Start a service.
- Stop a service.
- Refresh a service.
- Open service-specific Settings.
- Manage licenses for CompuTec PDC (Plant Data Capture) and CompuTec WMS (Warehouse Management System).
Configure Service Settings
To configure service settings, follow these steps:
-
Select the service from the list.

-
Click Settings.

-
The Server Settings tab allows you to configure the License Server.

In the Server Settings tab, you can:
-
View or update Server Name: The name of the CompuTec License Server.
-
View or update Port Number: The communication port used by the CompuTec License Server. The default value is recommended unless your environment requires a different port.
-
Test the server connection: Click Test next to the port number.

-
Configure additional parameters:
- Logging Level: Controls the amount of information written to log files.
- Log Location: Displays the location where log files are stored.
-
Configure CompuTec License Server Database Connection
To allow the CompuTec License Server to communicate with SAP Business One company databases, configure a database connection.
Step 1: Add a database server
To establish a connection between the CompuTec License Server and the SAP Business One database, follow these steps:
-
Click the Database Connection tab.

-
Enter the database server details, and click Add.
 info
infoDepending on a database server type, specify the server name in the below format:
Database Server Type Server Name Format Example Microsoft SQL Server (default instance) ServerNameTest-SystemMicrosoft SQL (named instance) ServerName\InstanceNameTest System\ProductionSAP HANA ServerName:Port10.0.0.199:30015For SAP HANA Server users
The method of obtaining the database server name depends on your SAP Business One authentication method.
-
Classic SAP Business One login: The database server name is displayed in the Current Server field of the SAP Business One menu > Administration > Choose Company window.

-
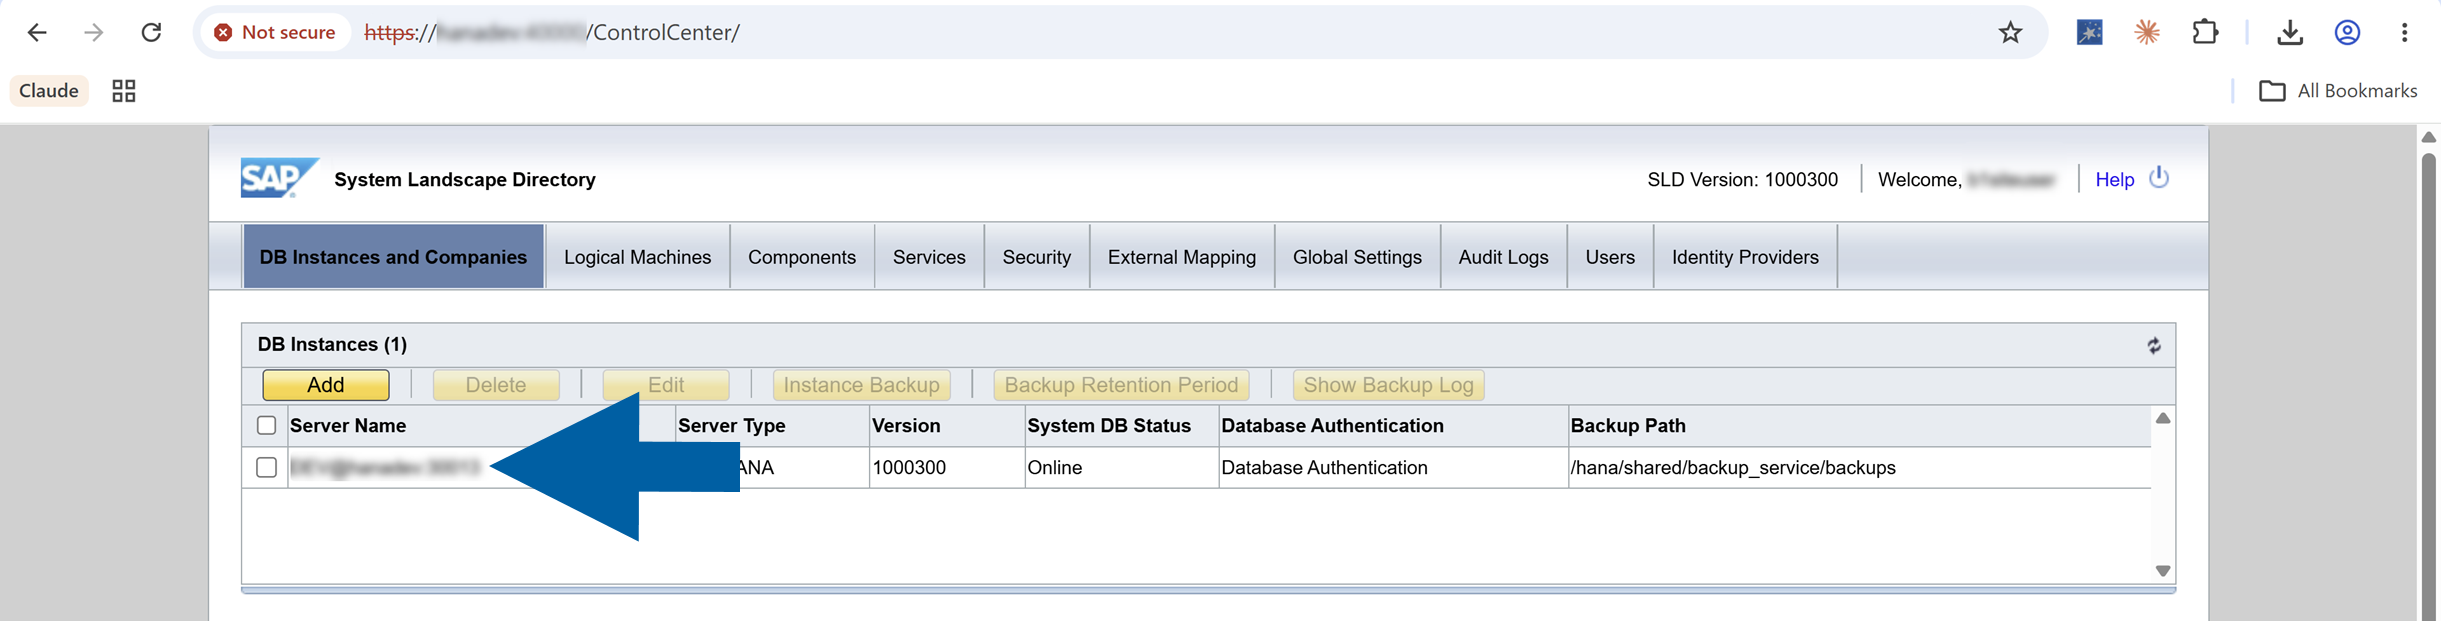
SAP Business One Authentication Server or Active Directory Domain Services: You can find the database server information in one of the following locations:
-
Choose Company window displayed during sign-in, where the server is shown in the format:
TenantName@DatabaseServer:Port. Example:DEV@hanadev:30013. -
System Landscape Directory(SLD) > DB Instances and Companies, where the Server Name column displays the connection in the same format.
-
For Microsoft SQL Server users
For Microsoft SQL Server, you can also verify the server and instance name in SQL Server Management Studio:
-
Click Connect in Object Explorer, and then select Browse for more... in the Server name field.

-
You will find the server details in the Browse for Servers window.

-
-
Select the Database Server Type.

-
Enter the Database User Name and User Password, and click Save.
 note
noteYou can configure connections to multiple database servers.

-
If the connection is successful, a confirmation message appears and the number of company databases available on the server is displayed next to the server entry.
 important
To see a newly restored/imported company database, refresh the company list before refreshing the database list in CompuTec License Server.

Step 2: Verify the connection
-
Click on the database name to expand its server node.
informacjaAfter this step, the warning:
Direct Data Access mode is disabled.will no longer appear when launching CompuTec ProcessForce, provided that the connection to CompuTec License Server is configured correctly in CompuTec ProcessForce License Administration (see Extension → License assignment section). -
Verify that the required SAP Business One company databases are available.
 note
noteWhen you select a configured database server, the stored credentials are masked for security reasons.

-
Done! You've successfully configured CompuTec License Server Database Connection.
To use CompuTec ProcessForce with CompuTec License Server, make sure that:
- the database connection is configured in CompuTec License Server, and
- a valid CompuTec ProcessForce license is imported and assigned. Read more
When both configurations are complete, the Direct Data Access mode is disabled warning no longer appears when starting CompuTec ProcessForce.
Result
After completing these steps, you can:
- Access and manage CompuTec services from a single location.
- Start, stop, and restart CompuTec services.
- Manage licensing for CompuTec PDC and CompuTec WMS.
- Review and update CompuTec License Server settings.
- Configure logging options for troubleshooting and diagnostics.